
English 


Views: 0 Author: Site Editor Publish Time: 2026-07-10 Origin: Site


Replacing outdated or failing exterior doors begins with a critical, often underestimated phase: safe and precise removal. Improper extraction of old units frequently results in shattered glass, damaged interior trim, or compromised rough openings. These mistakes lead to costly delays and structural repair requirements before a new installation can even begin. When you pull an old frame out of a wall, you are dealing with heavy materials, hidden fasteners, and years of weatherproofing adhesive that fight against you every step of the way.

This guide provides a systematic, evidence-based methodology for dismantling and removing Patio Doors. We focus on mitigating structural risks and preparing the framework for a seamless replacement. By following a strict sequence of hardware removal, panel extraction, and frame dissection, you protect the surrounding drywall and exterior siding. Whether you are dealing with a standard aluminum slider or a heavy wood-clad hinged unit, executing these technical steps ensures a clean extraction and a solid foundation for your new unit.
Safety and Weight Mitigation: Standard glass panels weigh between 50 and 100 pounds; safe extraction requires specific lifting techniques, suction tools, and a minimum of two people.
Sequential Dismantling: Successful removal follows a strict order: screens, security stops, active panels, stationary panels, interior trim, and finally, the door frame.
Hardware Retraction: For sliding units, retracting the bottom rollers and removing anti-lift devices are mandatory first steps to clear the tracks without damaging the frame.
Rough Opening Preservation: Utilizing the correct prying tools and cutting fasteners prevents collateral damage to drywall, exterior siding, and underlying weatherproofing.
Table of Contents
Before touching a pry bar, you must evaluate the existing setup. Differentiate the approach required for sliding glass doors versus hinged French units. Note the location of the stationary panel, active tracks, and concealed fasteners. Sliding models typically have an active panel that rides on bottom rollers and a fixed panel secured by hidden brackets and heavy sealant. Hinged units rely on side jamb hinges and often feature complex multi-point locking mechanisms. Recognizing these structural differences dictates your entire removal sequence.
Take a close look at the track system. Some older aluminum sliders have the active panel on the exterior track, while most modern vinyl units place the active panel on the interior. This placement changes where you stand during the lift and how you angle the glass. For hinged units, determine if they are inswing or outswing. Outswing doors often have security hinges with non-removable pins, requiring you to unscrew the entire hinge plate from the jamb rather than simply tapping out a pin.
Modern and retrofitted units incorporate safety mechanisms specifically designed to prevent the panels from being lifted out of their tracks by intruders. You must identify top-track bumpers, anti-lift blocks, and security locks that must be disengaged before panels can be extracted. These blocks usually sit in the upper channel directly above the active panel. If you attempt to force the door upward without removing them, you will bend the header track or, worse, shatter the tempered glass under the pressure.
Look for secondary security devices. Many homeowners install aftermarket pin locks that drill through the active panel frame into the stationary panel. Others use track blockers or heavy-duty charley bars. Every single one of these physical obstructions must be unscrewed and removed. Check the top header channel with a flashlight; anti-lift blocks are often small pieces of black plastic that blend into the dark recess of the track.
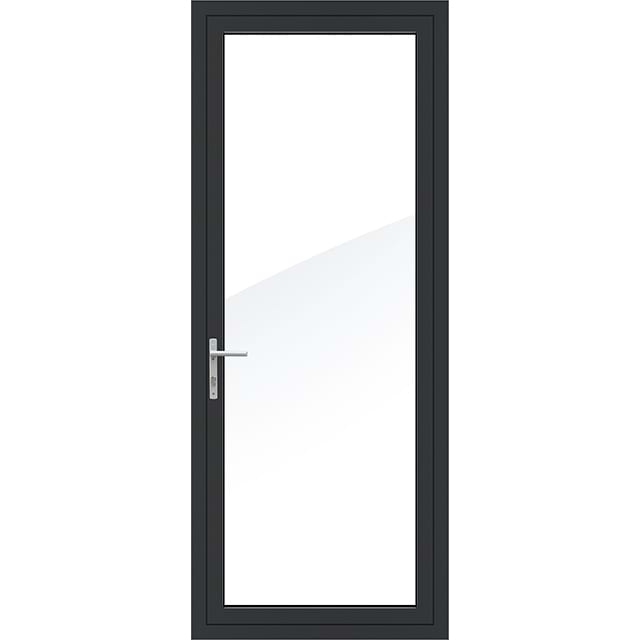
Evaluate the age of the unit before dismantling. Homes built prior to 1978 may contain lead paint on the exterior trim or the door frame itself. If you suspect lead paint, you must follow specific containment protocols, including using HEPA vacuums and avoiding aggressive scraping or sawing that generates airborne dust. Furthermore, older glass manufactured before modern building codes may not be tempered. Non-tempered glass breaks into large, lethal shards rather than small, relatively safe cubes, presenting severe laceration risks if broken during removal.
Inspect the surrounding drywall, baseboards, and exterior siding for signs of water intrusion. Dark stains, peeling paint, or soft wood at the bottom corners of the door frame indicate severe rot in the underlying framing. If the sill plate or jack studs are rotted, the scope of your project just expanded from a simple door swap to structural reframing. Identifying this early allows you to stage the necessary lumber and flashing materials before you leave a gaping hole in your house.
Define the threshold for DIY removal. A standard extraction on a ground-level floor is highly manageable for a competent homeowner with a helper. However, if the frame is load-bearing, severely rotted, or integrated into complex stucco or brick siding, professional extraction is recommended to maintain structural integrity. Stucco, in particular, requires specialized cutting and patching techniques to ensure the new installation remains watertight.
Consider the physical logistics. If the door is located on a second-story balcony, the risk factor multiplies. Maneuvering a 100-pound glass panel down a flight of stairs or lowering it over a balcony requires specialized rigging and experience. If you lack the tools to reframe a rotted sill, patch exterior masonry, or safely transport heavy glass, hiring a contractor is the most logical decision.
Gathering the right tools prevents mid-project delays and minimizes damage to the rough opening. You need specific equipment to handle stubborn fasteners, delicate trim, and structural cuts. Attempting this job with just a hammer and a standard screwdriver will result in damaged drywall and immense frustration.
Tool | Primary Function | Field Application Notes |
|---|---|---|
Flat Pry Bar & Stiff Putty Knife | Removing interior and exterior trim without damage. | Use the putty knife as a shield against the drywall while levering the pry bar to prevent punching holes in the wall. |
Reciprocating Saw (Metal Blade) | Cutting hidden fasteners and shims. | Essential for slicing through installation screws between the door jamb and the rough opening studs. |
Oscillating Multi-Tool | Precision cutting and breaking adhesive bonds. | Use a scraper blade attachment to slice through stubborn polyurethane adhesive under the bottom sill. |
Heavy-Duty Suction Cups | Lifting and maneuvering glass panels. | Provides a secure, ergonomic grip on the smooth glass surface, drastically reducing the risk of dropping the panel. |
Cordless Impact Driver | Removing rusted or over-torqued screws. | Use with high-quality bits to extract security blocks, strike plates, and hinge screws without stripping the heads. |
Handling large panes of glass demands strict safety protocols. Emphasize heavy-duty cut-resistant gloves and ANSI-rated safety glasses to protect against accidental shattering. Tempered glass can explode into thousands of pieces if the edge is tapped against a hard surface like a concrete patio. Wear closed-toe work boots with reinforced toes to guard against dropped panels or stepping on exposed casing nails.
Prepare the workspace to manage debris and mitigate risks. Lay heavy canvas drop cloths on both the interior floor and exterior patio to catch splinters, screws, and dust. Avoid plastic drop cloths on the floor, as they become severe slip hazards when covered in sawdust. Secure the exterior drop zone to keep pets and family members away from the work area.
Apply heavy-duty painter's tape in a large "X" pattern across both sides of the glass panels. While this will not prevent tempered glass from breaking, it helps hold the fragments together long enough to safely move the panel if a fracture occurs. Clear a wide path to your staging area where the old panels will be stored until disposal.
Begin the physical teardown by removing the sliding screen. Grip the sides of the screen frame and lift it upward into the top channel to clear the bottom track. Once the bottom rollers are free of the track lip, angle the bottom of the screen outward and pull it down and away from the header. Set it aside.
If you encounter corroded, stuck, or spring-loaded screen rollers, do not force the frame, as aluminum screens bend easily. Use a flathead screwdriver to reach under the bottom edge of the screen and gently pry the wheels upward into the screen frame, releasing the tension. Some screens have adjustment screws on the face of the bottom rail; turn these counterclockwise to retract the wheels fully before attempting to lift the screen out.
Clear the path for the active panel. Locate and unscrew plastic or metal anti-lift devices installed in the upper track recess. These components physically block the door from being lifted out. You will typically find them screwed directly into the header channel above the sliding panel. Use a drill or a manual screwdriver to back these screws out completely.
Inspect the bottom track for track bumpers. These are usually rubber or plastic blocks screwed into the sill track at the jamb to prevent the door from slamming against the frame. Remove these as well, as they can catch the bottom of the door during the extraction process. If any screws are stripped, use a pair of locking pliers to grip the screw head and turn it out manually.
Strip the door of protruding hardware to prevent snags during panel extraction. Unscrew and remove interior handles, exterior pulls, and keyed locking mechanisms. Keep a small magnetic tray nearby to hold all the screws and small parts, especially if you plan to reuse any of the hardware or need to reference it later.
Remove the frame-mounted strike plate from the side jamb. Stripping the hardware reduces the overall weight slightly and ensures a smooth lift without catching on the frame or your clothing. If the handle assembly is stuck after removing the screws, tap it gently with the handle of your screwdriver to break the paint or dirt seal holding it in place.
Note on Sequence: If the fixed panel brackets or jamb fasteners are concealed by interior trim casing, jump to the trim removal phase in Step 4 before attempting panel extraction. You must have clear access to all securing brackets.
To gain maximum clearance for lifting, you must lower the active panel. Locate the adjustment holes at the bottom of the active panel, usually covered by small plastic plugs on the interior face or the edge of the door. Remove the plugs. Insert a Phillips or flathead screwdriver and turn the adjustment screws counterclockwise.
This action retracts the rollers fully into the door housing, dropping the panel down and providing the necessary space to lift it over the bottom track. You should visually confirm that the door has dropped. If the screw spins freely without lowering the door, the roller assembly is likely broken or seized with rust. In this case, you may need to use a flat pry bar under the door to manually lift the weight off the roller while someone else attempts to turn the screw.
Use a two-person lift technique for safe extraction. Attach your heavy-duty suction cups to the glass, ensuring the surface is clean for a solid vacuum seal. Stand on the interior side of the door. Grip the panel firmly, lifting it squarely into the upper header track. You must lift it high enough so the bottom edge completely clears the lip of the bottom sill track.
Once the bottom clears the sill track, angle the bottom inward toward the room (or outward, depending on the specific track design) and carefully lower it out of the frame. Communication with your lifting partner is critical here. Lower the panel evenly to avoid binding it in the header track. Set the active panel aside on a padded surface, leaning it against a wall at a slight angle to prevent it from tipping over.
The fixed panel requires significantly more effort to release, as it is designed to stay put. Follow these steps to break it free:
Locate and remove the L-brackets, retaining clips, or security screws securing the fixed panel to the top header, side jamb, and bottom sill. These are often hidden under plastic covers or buried in old caulk.
Score the perimeter caulk and factory glazing seals with a sharp utility knife. You must cut through the sealant on both the interior and exterior sides where the panel meets the frame.
Use a stiff putty knife to break any remaining adhesive bond between the panel frame and the side jamb.
Slide the stationary panel toward the center of the track to disengage it from the interlocking jamb. You may need to bump the edge of the frame with the heel of your hand or a rubber mallet to get it moving.
Once free from the side jamb, lift it up into the header and angle it out, executing the exact same lifting technique used for the active panel.
For hinged units, the process focuses entirely on the hinges rather than tracks. Open the door slightly. Support the door weight using wooden shims or a flat pry bar under the bottom edge. This prevents the door from dropping and binding the hinges as you remove the pins.
Tap out the hinge pins from bottom to top using a hammer and a pin punch. Start with the bottom hinge, move to the middle, and finish with the top hinge. Once the top pin is removed, the door will be completely free. Carefully pull the door panel away from the frame. For heavy solid-core wood or fiberglass doors, ensure two people handle the panel to prevent it from falling and damaging the floor.
The swing direction dictates your approach to the hinges. Inswing doors have pins accessible from the inside, making removal straightforward. Outswing doors, however, expose the hinges to the exterior. To prevent burglars from simply tapping the pins out, outswing doors feature security hinges with non-removable pins or set screws.
For outswing models with security hinges, you cannot remove the pins. Instead, you must unscrew the hinge plates directly from the door jamb. Open the door, support the weight with shims, and use an impact driver to remove the screws from the jamb side of the hinge. Again, start at the bottom and work your way up, having a partner hold the door steady as the final screws are removed.
After the heavy panels are out of the way, strip the remaining hardware from the frame. Remove multi-point locking receivers, top and bottom flush bolts, and astragals embedded in the passive door panel or frame. Clearing this hardware prepares the frame for extraction and prevents sharp metal edges from causing deep lacerations during the teardown process.
Protect the surrounding drywall during trim removal. Use a wide putty knife as a shield, placing it flat against the wall right next to the trim. Insert a flat pry bar between the putty knife and the trim. Gently pry away the interior casing, extension jambs, and baseboard trim.
Work slowly, moving the pry bar up and down the length of the trim to loosen the finish nails gradually. If you pry too hard in one spot, you will snap the wood. If you intend to reuse the casing, pull the nails out through the back of the trim using pliers rather than hammering them back through the face, which blows out the finished surface.
Score the exterior silicone sealant where the frame meets the siding or brickmould using a utility knife. The decision to leave exterior brickmould intact versus full removal depends entirely on your replacement strategy. If you are doing an insert replacement, the brickmould stays, and the new door slides into the existing frame.
For a full-frame replacement, which is the most common and thorough method, pry off the exterior trim to expose the rough opening and the nailing fin. If the door is integrated into stucco, you may need to use an angle grinder with a masonry blade to cut back the stucco a few inches to access the nailing fin. This requires extreme caution to avoid cutting into the underlying weather resistant barrier.
The frame is secured to the rough opening with heavy screws, nails, and wooden shims. Do not attempt to pry the frame out with brute force; you will damage the king studs. Instead, use a reciprocating saw equipped with a long metal-cutting blade.
Slide the blade between the door frame and the rough opening studs. Run the saw up and down the side jambs and across the header, cutting straight through installation screws, casing nails, and wooden shims. Keep the blade flat against the back of the door jamb to avoid cutting into the structural framing of the house.
The bottom sill is usually glued down aggressively to the subfloor or concrete slab to prevent water infiltration. Slice through stubborn polyurethane construction adhesive or silicone underneath the bottom metal sill using a long utility blade or a flat bar. Work carefully to avoid tearing up the wooden subfloor or chipping the concrete pad.
If the adhesive is rock hard, an oscillating multi-tool with a rigid scraper blade works exceptionally well for breaking this bond. Plunge the scraper blade under the sill and work your way across the entire width of the door. Do not pry upward on the sill until the adhesive bond is completely broken, or you will bend the metal frame and potentially damage the floor beneath it.
With all fasteners cut and the bottom adhesive broken, remove the frame. The safest method is to collapse the frame inward. Use your reciprocating saw to cut the side jambs in half horizontally. Grab the cut ends and fold the jambs inward toward the center of the opening, pulling them away from the rough opening studs.
Repeat this process for the header and the sill. By cutting the frame into smaller, manageable pieces and folding it inward, you eliminate the risk of the frame binding against the rough opening and causing collateral damage to the surrounding wall structure.
Once the opening is completely bare, inspect the raw framing. Check the wooden sill plate, jack studs, king studs, and subfloor for wood rot, mold, insect damage, or structural degradation. Probe any dark, discolored, or soft spots with a screwdriver. If the screwdriver sinks into the wood easily, the wood is rotted.
Any compromised wood must be cut out and replaced before installing the new unit to ensure structural integrity. Installing a brand new, heavy door over a rotted sill plate guarantees that the door will sag, bind, and eventually fail. Take the time to reframe the opening correctly using pressure-treated lumber for the sill plate.
Assess the existing moisture barrier. Remove all old silicone, construction adhesive, and torn flashing tape using a scraper and a wire brush. The rough opening must be completely clean and smooth. Evaluate the existing sill pan and determine if the house wrap needs repair or replacement.
Proper weatherproofing at this stage is critical to prevent future leaks around the new Patio Doors. If the old flashing is brittle or peeling, strip it off entirely. You will need to apply new flexible flashing tape to the sill and run it up the sides of the jack studs to create a continuous, watertight barrier before the new door goes in.
Verify your dimensions before unboxing the new door. Measure the width of the raw opening at three points: top, middle, and bottom. Measure the height at the left side, center, and right side. Measure the depth of the jamb.
Use the smallest measurement of the width and height to ensure compatibility with the replacement unit. The rough opening should typically be 1/2 inch to 3/4 inch wider and taller than the actual door frame. This gap is absolutely necessary to allow room for plumbing the door, squaring the frame, and injecting low-expansion foam insulation.
Clean the rough opening thoroughly, scraping away all old caulk, adhesive, and construction debris to ensure a flat installation surface.
Address any structural rot immediately by cutting out compromised wood and replacing damaged sill plates or jack studs with fresh lumber.
Apply new waterproof flashing tape to the sill and run it up the jambs to create an impenetrable watertight barrier.
Verify your rough opening measurements one final time against the manufacturer specifications before ordering or unboxing the new unit.
A: A standard glass panel typically weighs between 50 and 100 pounds, depending on the overall size, frame material, and whether the glass is double or triple-paned. Always use two people and heavy-duty suction cups for safe lifting to prevent injury and property damage.
A: The door is likely blocked by anti-lift devices installed in the upper track, or the bottom rollers are not fully retracted. Remove any plastic or metal blocks screwed into the header channel and turn the roller adjustment screws counterclockwise to lower the panel completely.
A: Most modern sliding doors are specifically designed to be removed from the inside for security reasons. The active panel must be lifted into the interior header channel. Attempting removal from the outside is usually physically blocked by the exterior track design.
A: Locate and remove all securing brackets and hidden screws. Score the perimeter caulk heavily with a utility knife. Use a stiff putty knife or flat pry bar to gently break the adhesive seal between the panel and the side jamb before sliding it toward the center.
A: Use a long utility blade, a stiff putty knife, or an oscillating multi-tool equipped with a rigid scraper attachment to slice through the construction adhesive underneath the sill. Work slowly and keep the blade flat to avoid chipping the concrete pad.
A: It depends entirely on the installation type. For an insert replacement, the exterior trim usually remains intact. For a full-frame replacement, you must remove the exterior trim or brickmould to access the nailing fin and properly flash the rough opening.
A: Tape the glass in a large "X" pattern to hold fragments together if it breaks. Contact your local waste management facility for large item pickup, or transport the panels carefully to a recycling center that accepts construction materials and tempered glass.


